Installation
Modern Binary Exploitation (MBE) is a free course developed and used by RPISEC to teach Modern Binary Exploitation at Rensselaer Polytechnic Institute. It covers basic x86 reverse engineering, vulnerability analysis, and classical forms of Linux-based userland binary exploitation. It also focuses on protections found on modern systems and the techniques used to defeat them. This course comes with a large number of labs that I’ll explain/solve in this write-up.
This installation procedure is based on the official documentation of the MBE repository. I suggest you read it if you need more details on how to setup the lab.
You can download the slides or clone the repository with the following command:
git clone https://github.com/RPISEC/MBE
Lab Breakdown
The challenges are based on the lectures present in the GitHub repository. If you don’t have the necessary knowledge to solve the labs, I advise you to read them before starting.
| Write-up | Topic | Corresponding Lectures | Available |
|---|---|---|---|
| 01 | Reverse Engineering | 01-03 | Yes |
| 02 | Memory Corruption | 04 | Yes |
| 03 | Shellcoding | 05 | Yes |
| 04 | Format Strings | 06 | Yes |
| 05 | DEP and ROP | 07 | Yes |
| 06 | ASLR | 09 | Yes |
| 07 | Heap | 10 | No |
| 08 | Misc and Stack Cookies | 11 | No |
| 09 | C++ | 12 | No |
| 10 | Linux Kernel | 13 | No |
| P1 | Project 1 | 01-06 | No |
| P2 | Project 2 | 01-12 | No |
Note: The Linux Kernel labs is not implemented in the provided virtual machine. I still need to find a way to implement them in order to provide the writeups.
Virtual Machine Setup
The Warzone is a custom wargame that was built from the ground up for this course. It provides a complete and consistent learning platform for the labs and projects. The wargame was built on top of a vanilla Ubuntu 14.04 32-bit server install, and is modeled after existing local privilege escalation themed wargames.
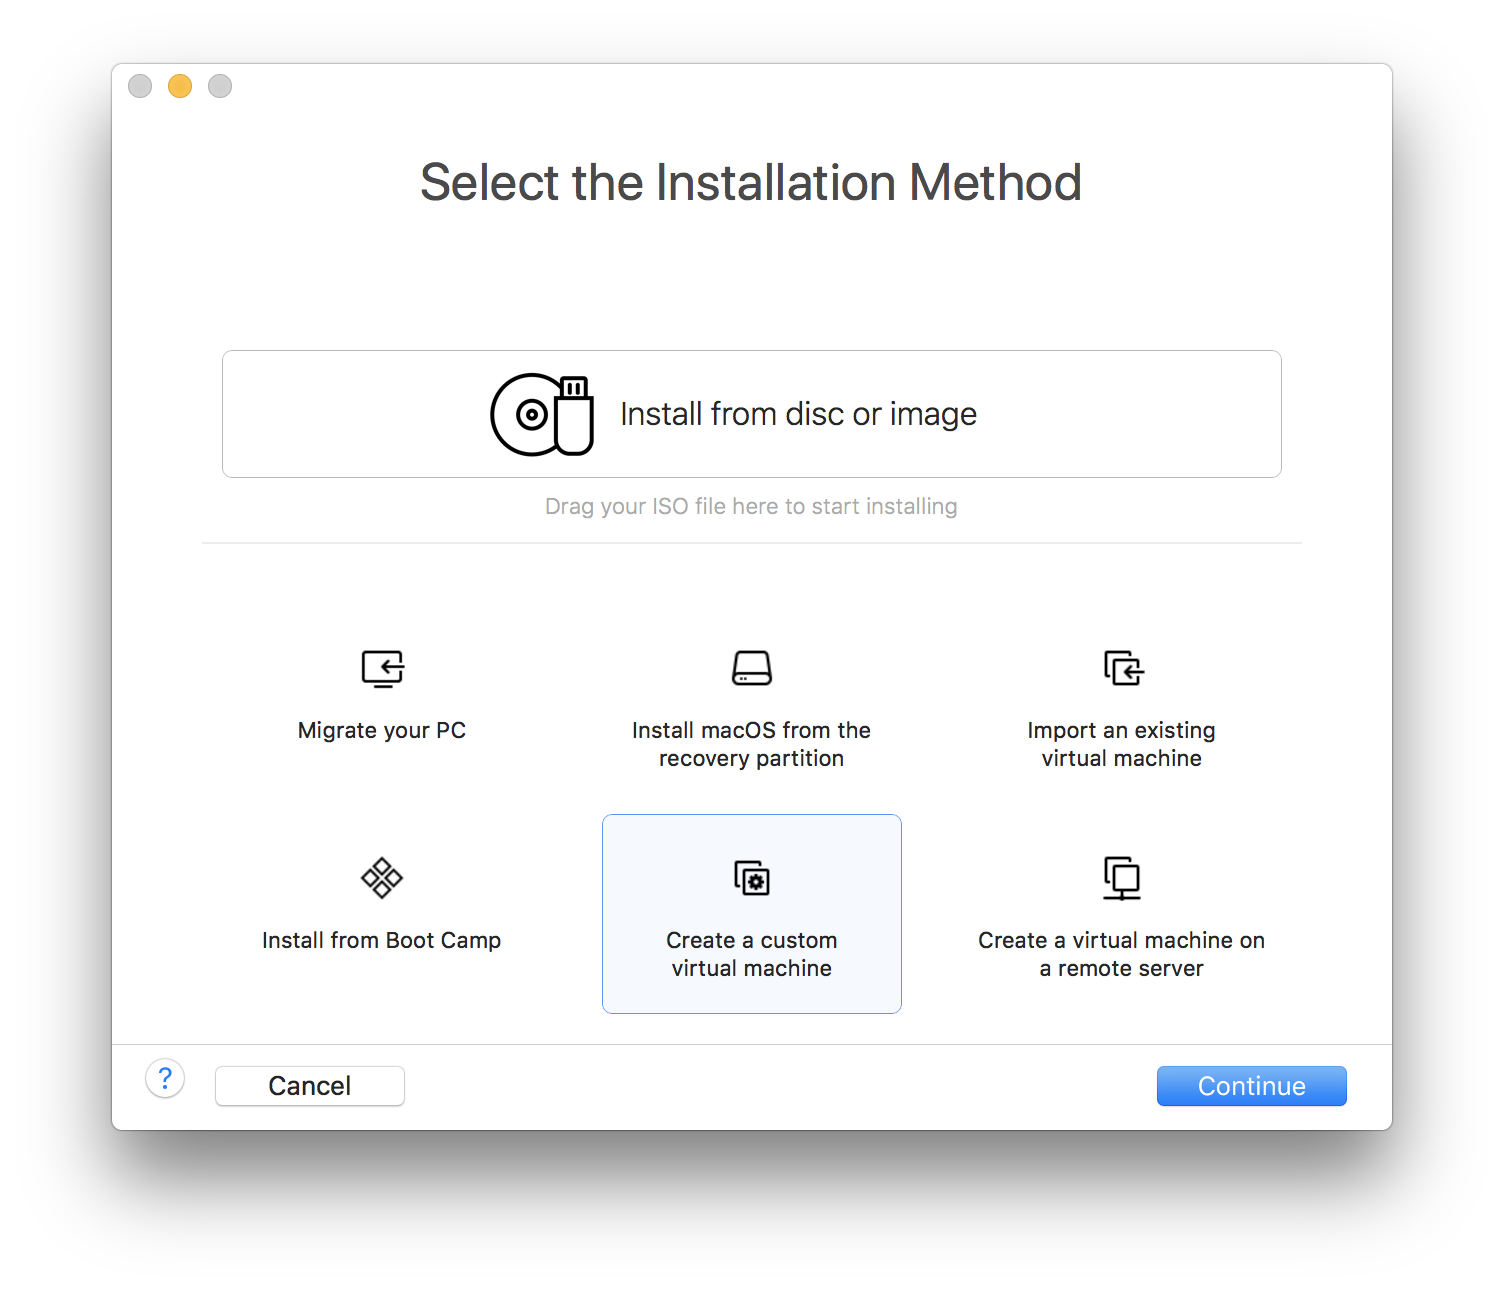
You can download the VMDK (disk image) of the Warzone that is already setup here. To install the VM, extract the VMDK and create a new custom virtual machine in VMWare.
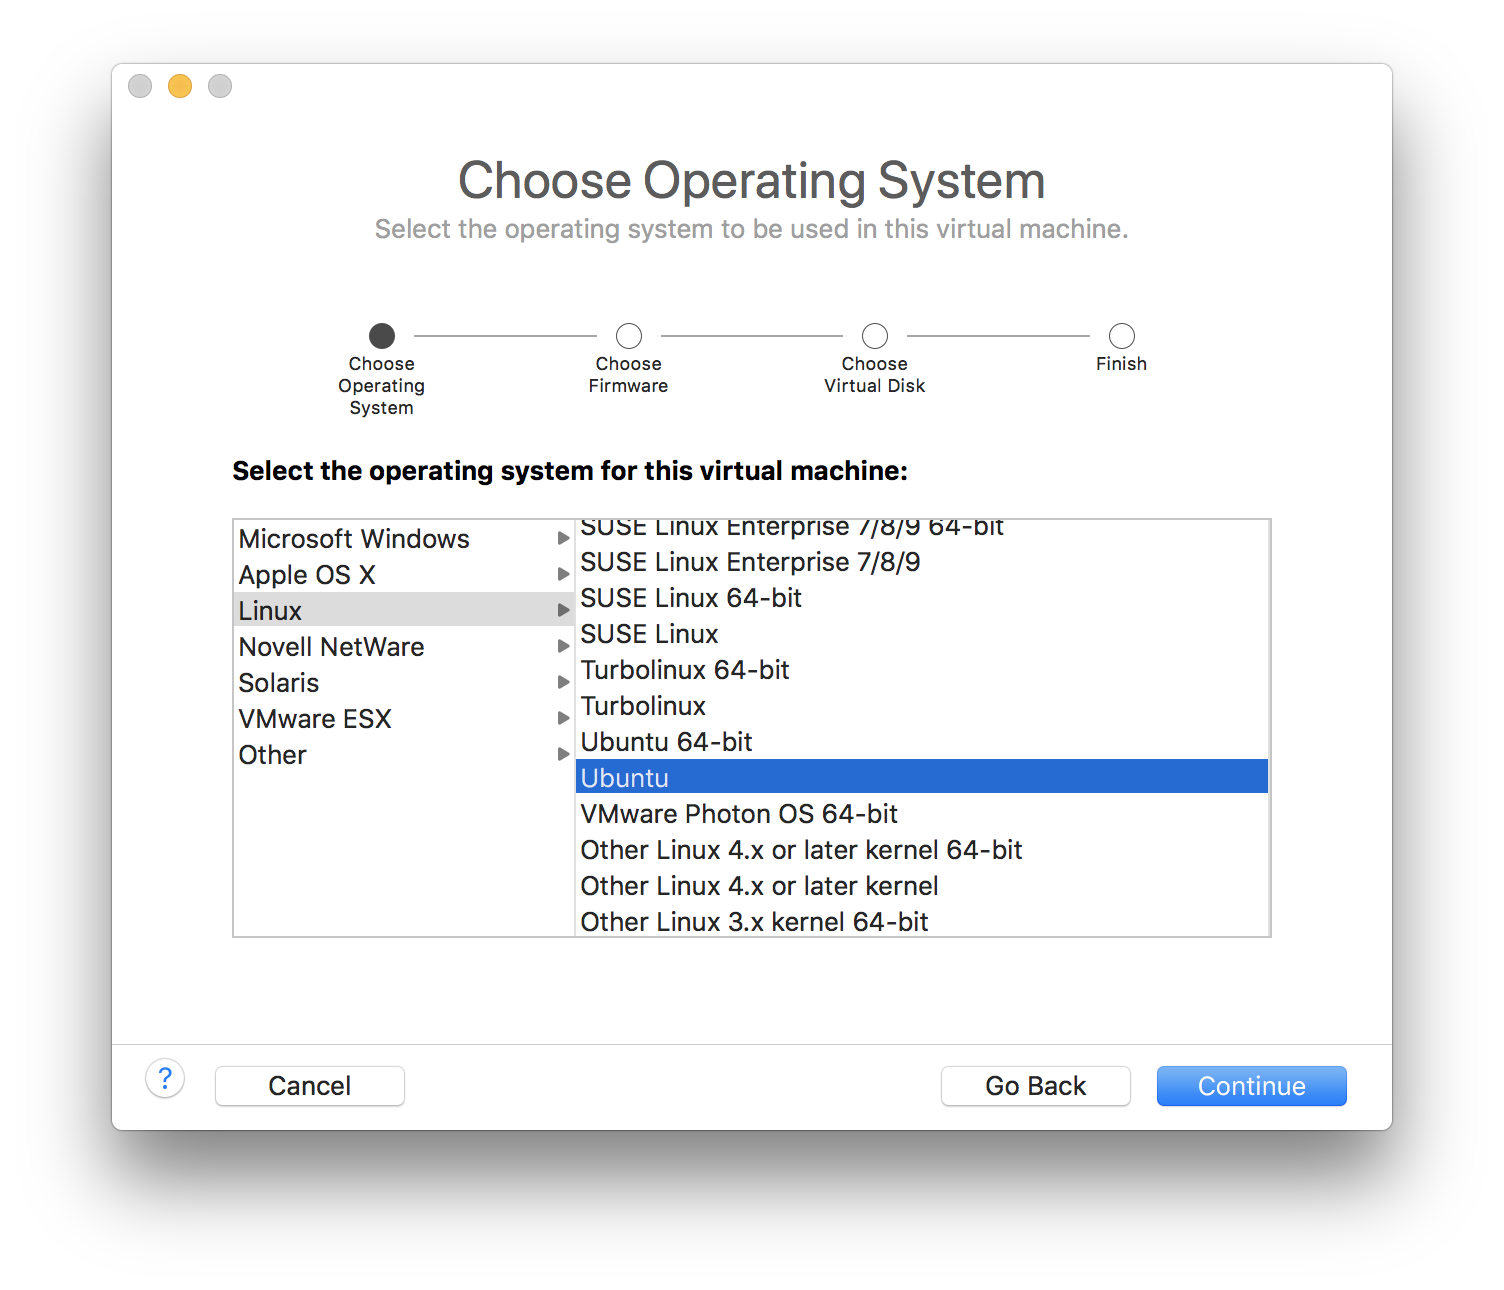
Then, select Ubuntu as operating system.
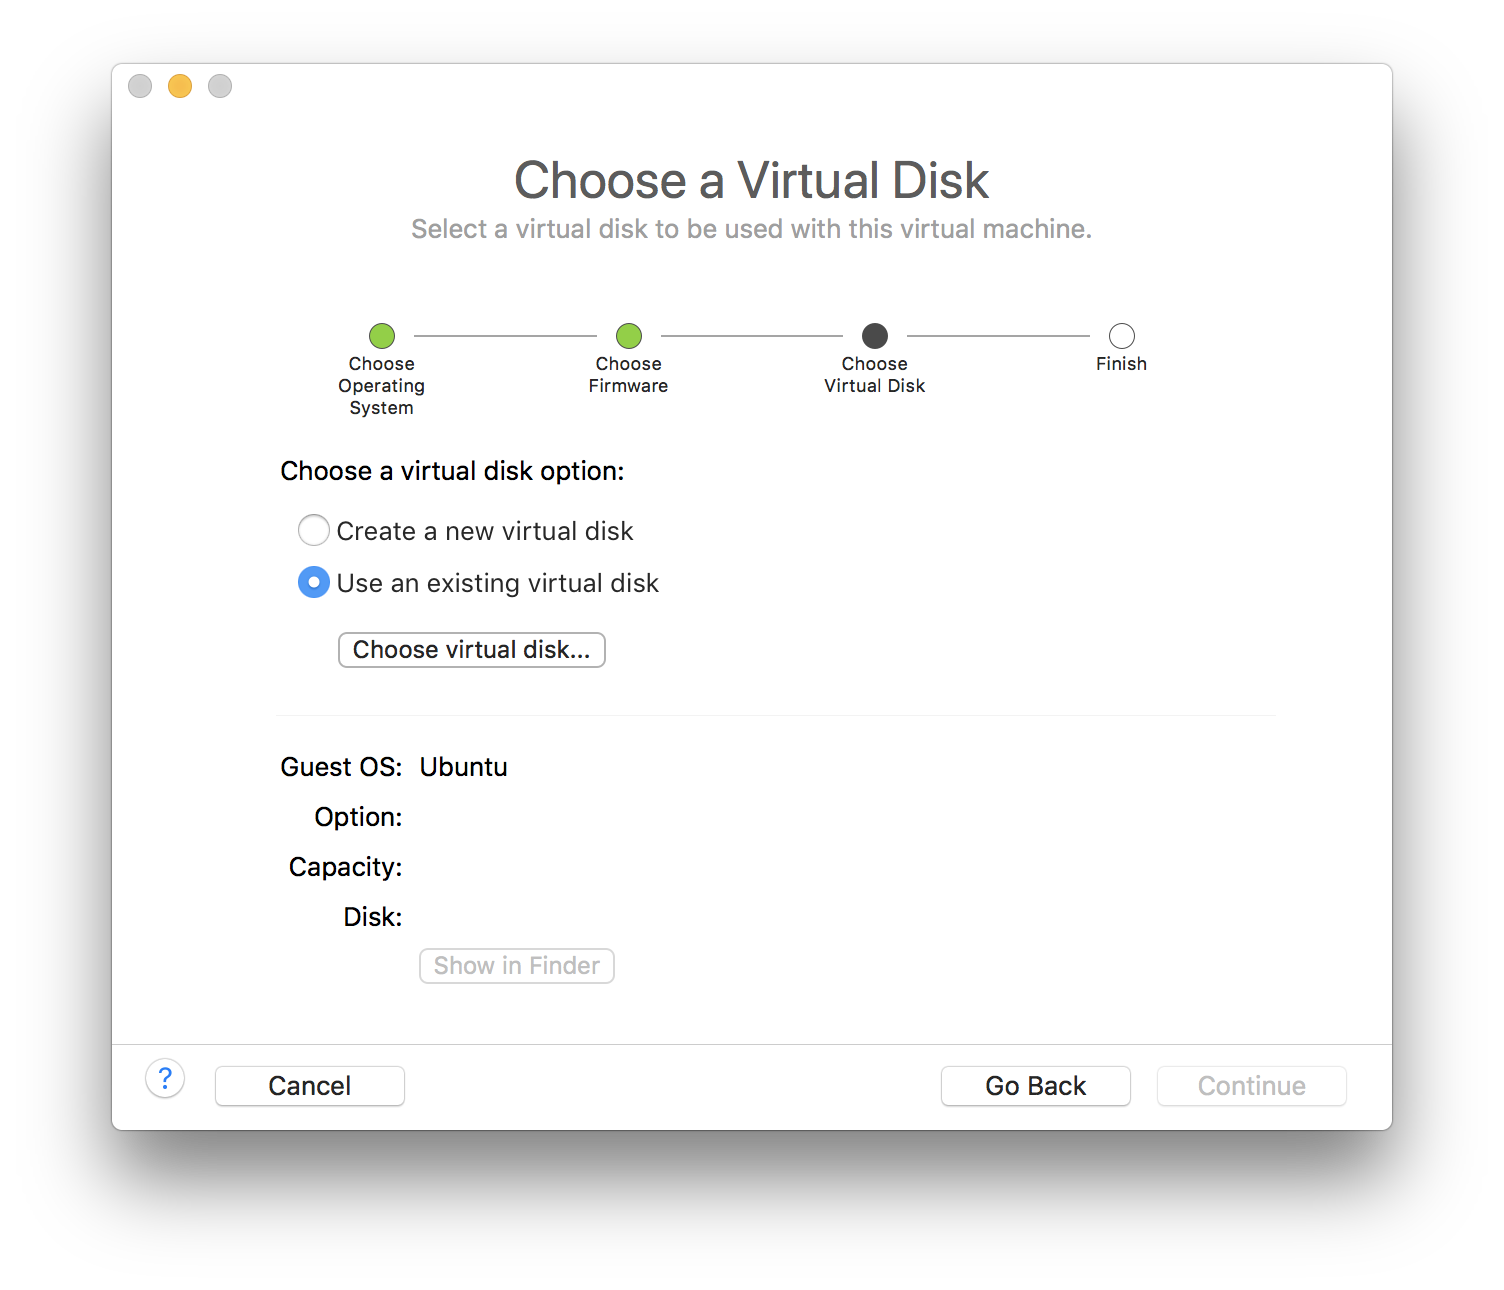
Finally, select the extracted VMDK as disk image.
As resources, you can stick to the following specifications:
- 1 CPU/Core
- 512MB RAM
- NAT Networking
How to use the Warzone
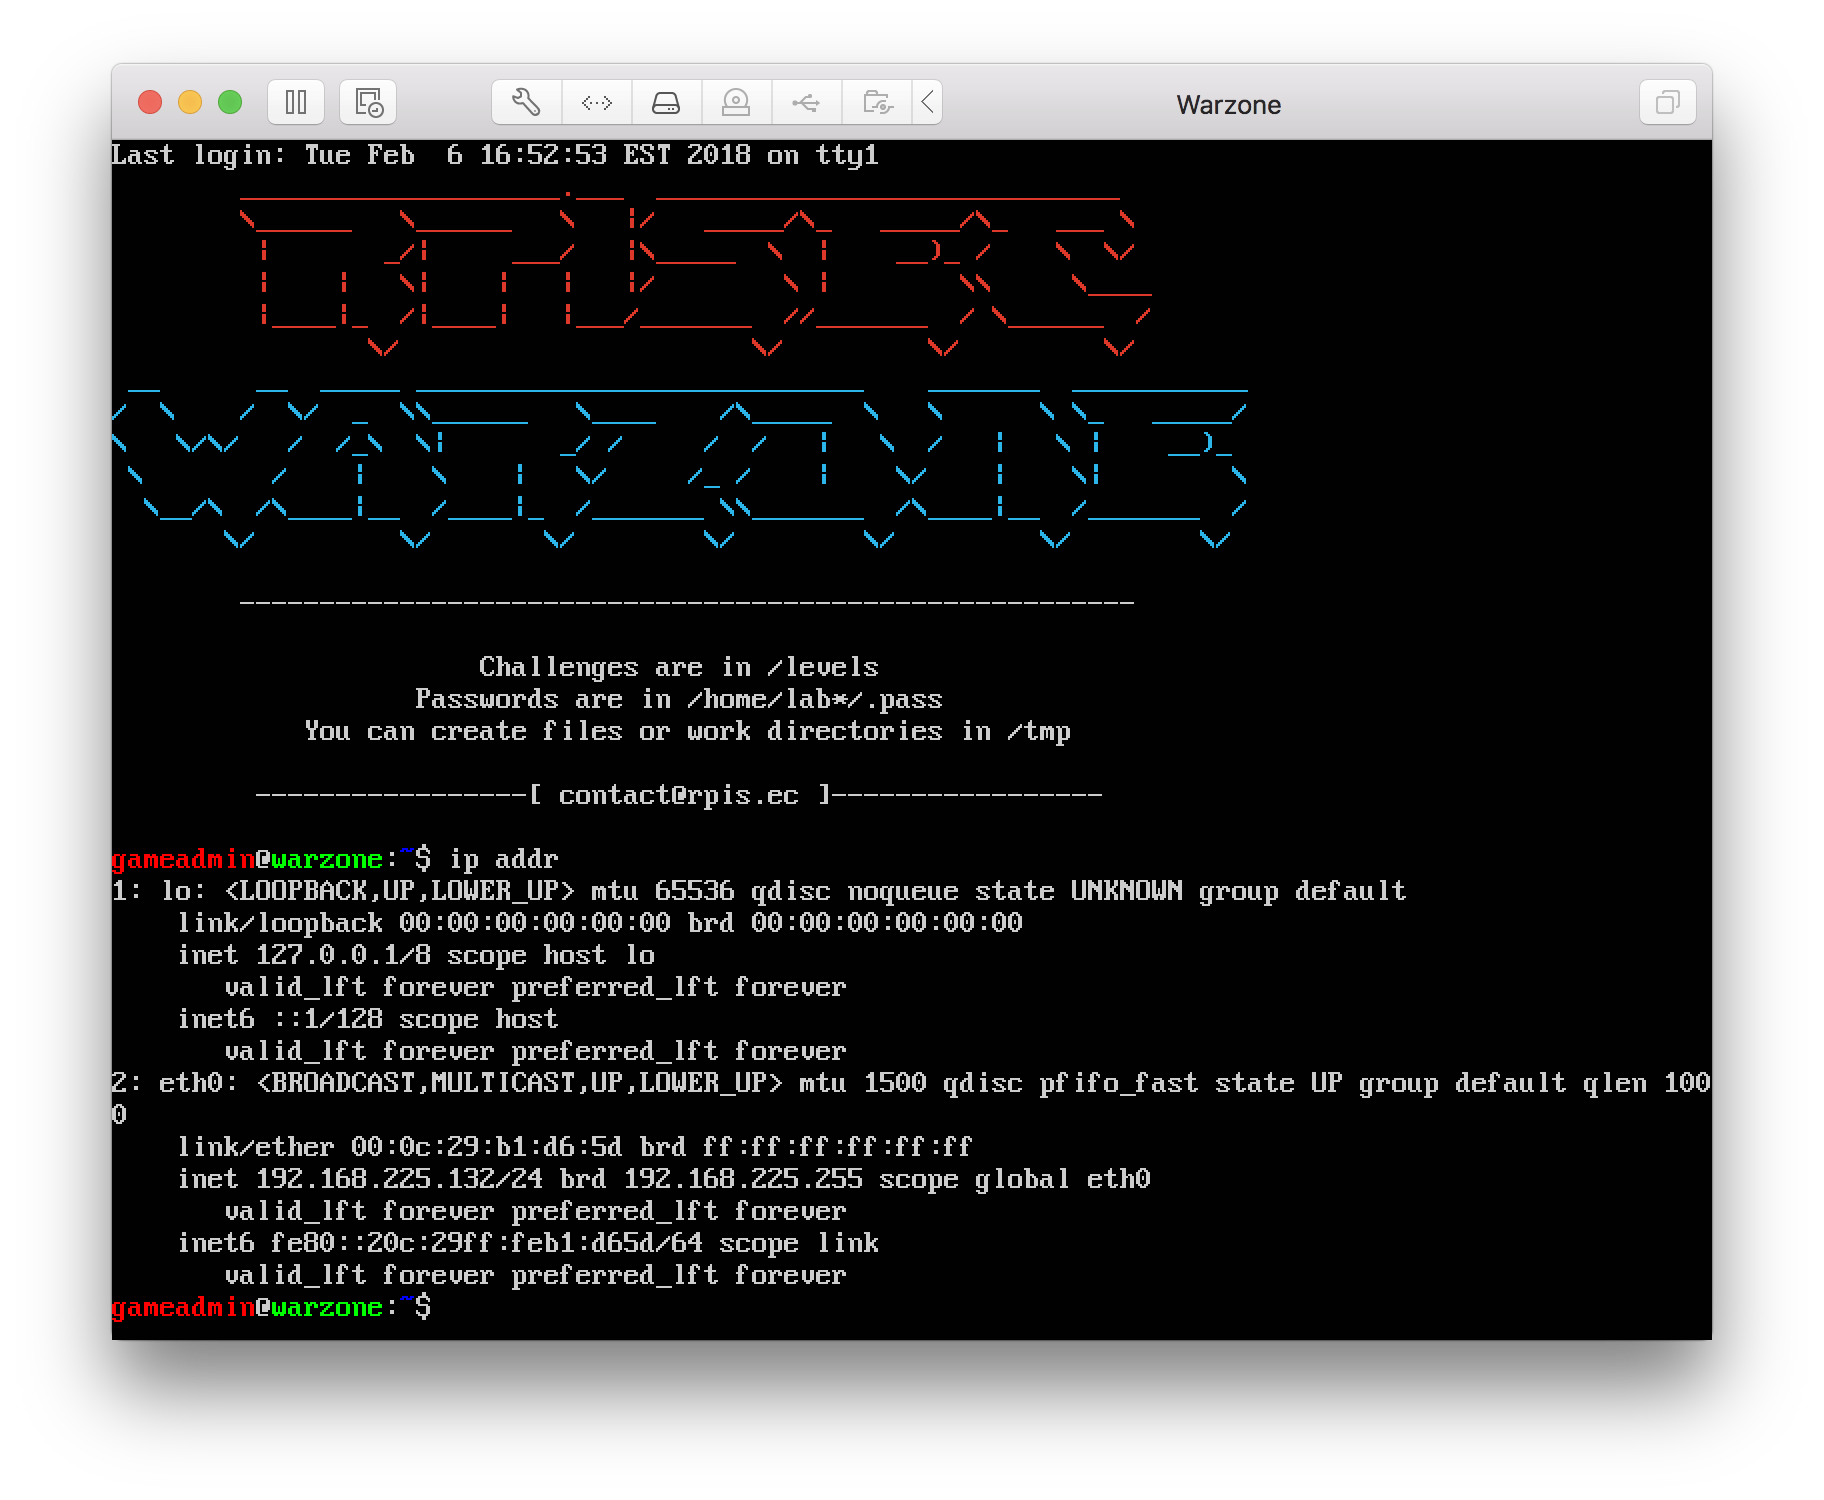
Once the Virtual Machine is created, you can get the IP address by login as gameadmin (gameadmin:gameadmin) and type the command ip addr.
Then, you can SSH into the first challenge by using the credentials lab1C:lab01start. This pattern is the same for the following challenges (eg. lab2C:lab02start).
The Warzone is structured like any local privilege escalation wargame. You must exploit a challenge to escalate your privileges and gain access to another user (level). Once you successfully exploit a level and escalate to the next user (confirm with whoami), you can read the user password from the home dir /home/$USER/.pass.
Note: The easiest level is labXC, then labXB and, finally labXA.
The levels (challenges) are located in /levels. If you need to write scripts/exploits, /tmp is writable and executable.
Licensing
This course was explicitly designed for academic & educational use only. Please keep this in mind when sharing and distributing our course material. The specific licenses involved can be found below.
The lectures are covered by the Creative Commons Attribution-NonCommercial 4.0 International license CC BY-NC 4.0.
The code in is covered by the BSD 2-Clause license. You can view this license in LICENSE.